Adding Backblaze B2 to Veeam
As my homelab environment expands and I start to backup not only my homelab but also my various photos and videos to an offsite location so that if something happens - most likely a hardware failure or some sort of misconfiguration, there's a way to restore everything. Using Microsoft Azure would be an expensive option at around AU$30.00 a month, so I decided to try out Backblaze B2 and their S3-compatible service that serves an equivalent capability for US$6.00 a month.
Creating the Backblaze Bucket
The first thing to get done once creating my Backblaze account was to create a bucket to store the objects as they get backed up. One thing I wanted to be able to experiment with was using Object Lock, effectively an immutability flag for the bucket. The default settings for the bucket have both encryption and Object Lock disabled, so I enabled Object Lock and the bucket was up and ready.

Creating the backup bucket in Backblaze
Setting the Object Lock Retention Period
Once the bucket was set up, I had a look at the immutability periods associated with the bucket. In our Cloud Connect environment, there is a minimum immutability period that must be set for any file that comes in to the environment, so it was interesting to see that the Backblaze Object Lock recommends only setting the retention policy in the backup software, not a default policy for all files.

Generating the Application Key
Once the bucket is created, the next step in the Backblaze console is to set up an application key to allow Veeam to write to the bucket. Once the key is made, the Application Key and Secret Key are shown, with the Secret Key only shown until you navigate away from the page, so make sure you record the key.

Creating a new application key
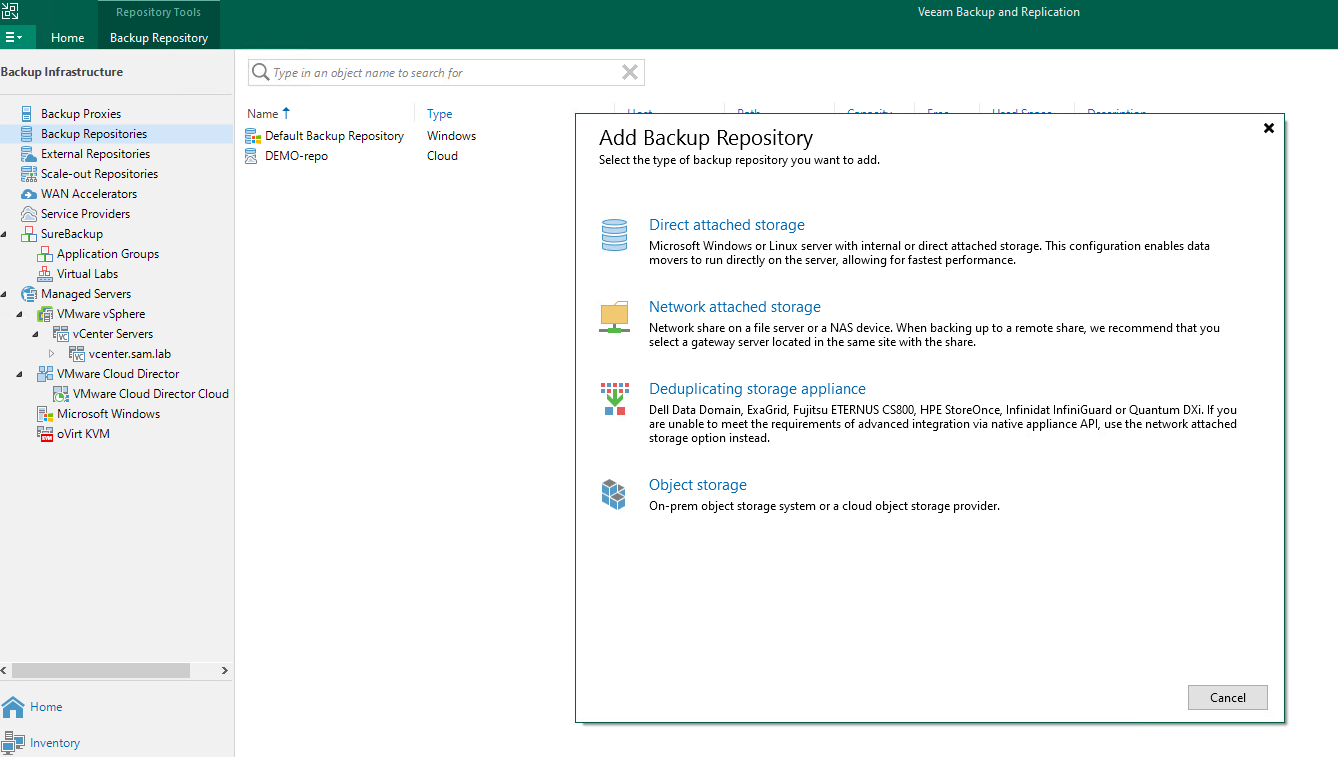
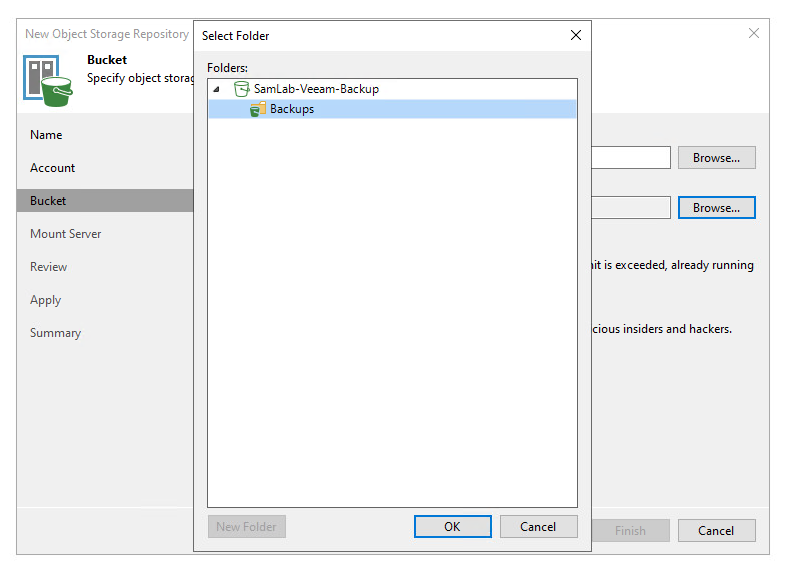
Adding the new Bucket in the Veeam Console
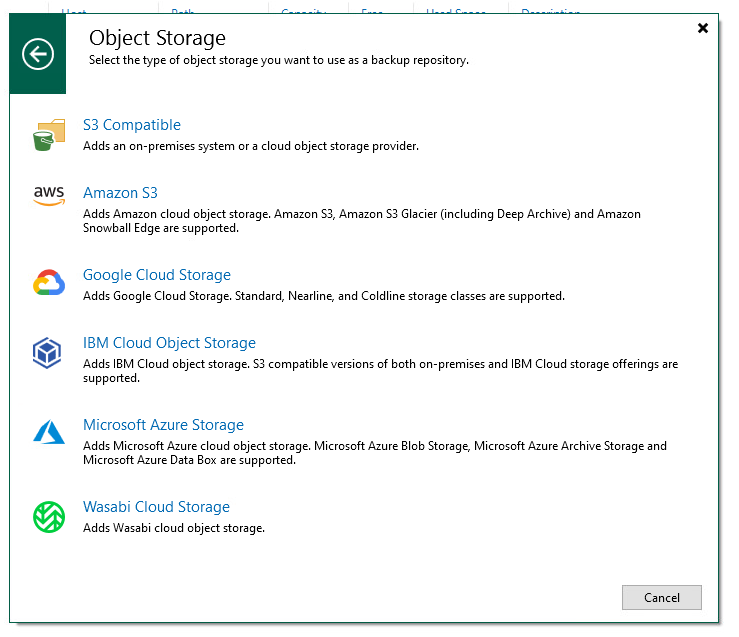
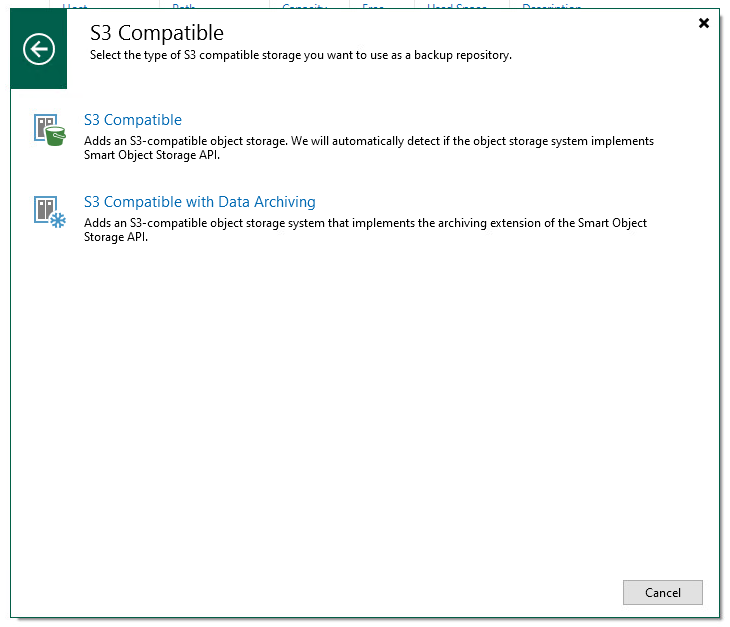
With the bucket created, the next step is to connect the new bucket to the Veeam console. The steps for this are pretty simple, just adding a new backup repository and selecting “Object Storage” and then selecting “S3 Compatible” and then “S3 Compatible”. The S3 with Data Archiving is for services that support data archiving, which at least for now I’m not looking to use and I believe that Backblaze doesn’t support.
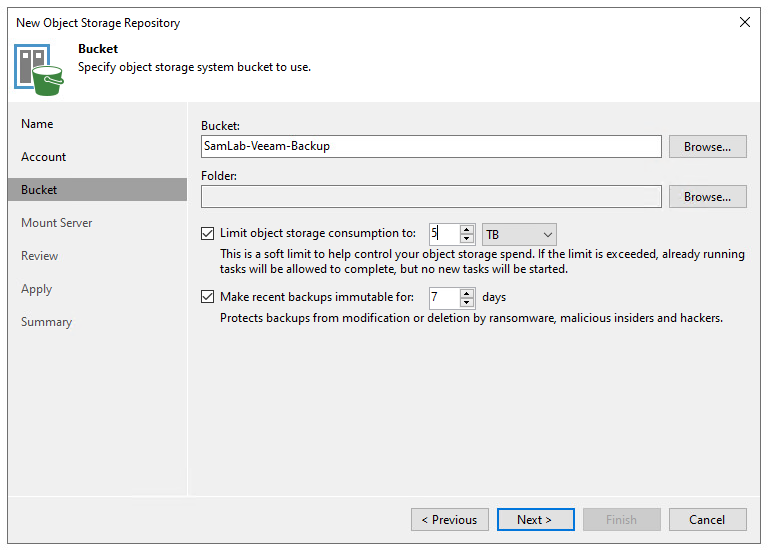
Configuring the Storage System
Next step is to define the endpoint that you’ll be connecting to, in my case this was the us-east-005 region. This was found as part of the bucket information on the Backblaze portal, and enter in the credentials in the form of the Secret Key to access the bucket. The connection mode determines how agents backup to the bucket, either by directly connecting to the bucket or by going via a gateway. A gateway would usually be used in instances where there are rate limits or data egress limitations that it makes sense to funnel traffic through a single location. The rest of the configuration is a familiar experience for anyone who has added a new repository in the past, following the next-next-next steps.

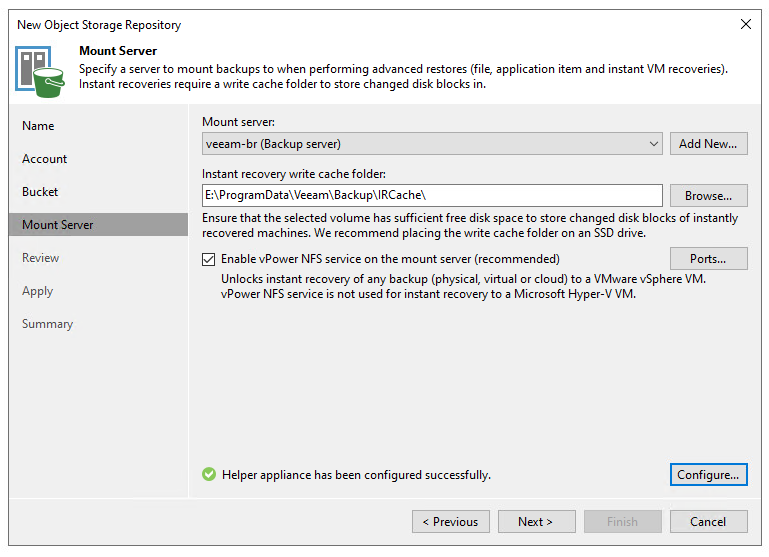
Write Cache
For those who haven’t used object storage in the past, given that the object storage is immutable and cannot be changed, we need to create a cache area for Veeam to use in the event a restore happens such as an instant VM recovery or a file-level recovery where the backup is mounted by Veeam. While not something that would be used regularly, having the ability to use this to speed up recovery from the object storage bucket if needed is a great capability to get back up and running in the event of an outage. I’ll hopefully be digging into this more in the coming days/months, as times allows.
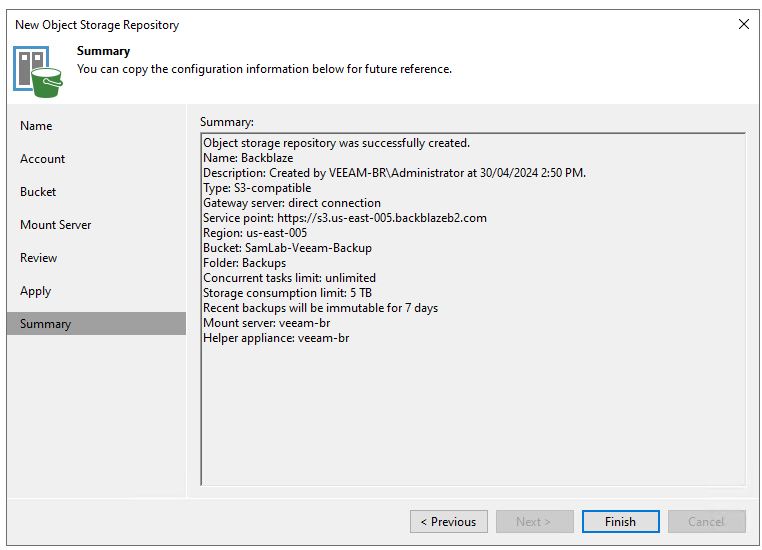
Wrapping Up
That’s pretty much the end-to-end in adding a Backblaze bucket to your Veeam Backup and Replication Server. The process is quick to get underway and start using. Once connected, the bucket is visible as another repository to be used by Veeam, as both a direct backup target as well as part of a Scale-Out Backup Repository (SOBR) within your environment.